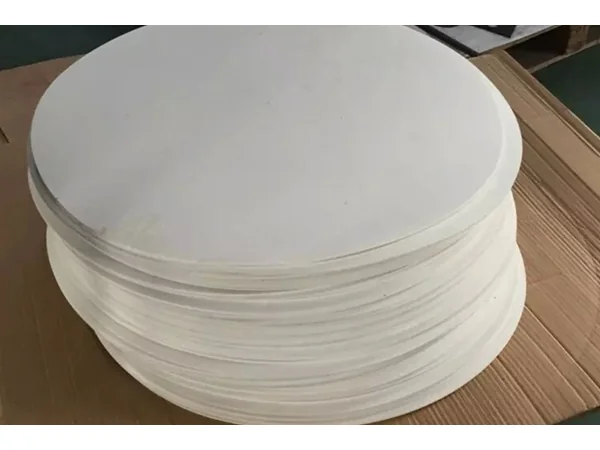
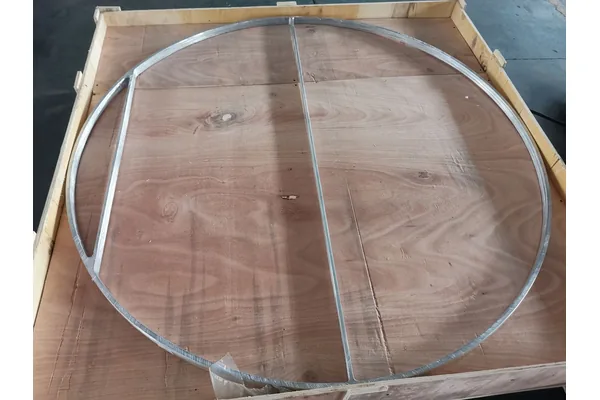
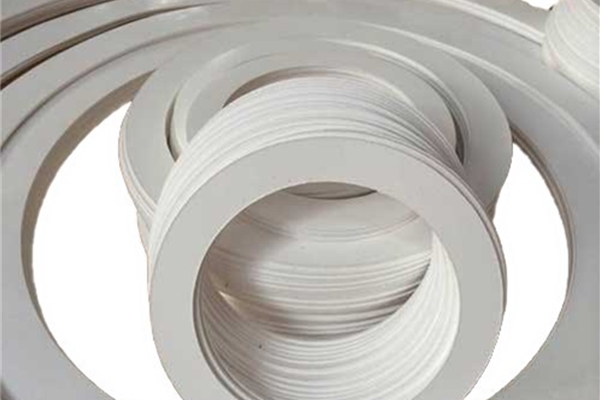
In sealing, gland packing remains a trusted solution for pumps, valves, and other equipment. Also known as braided packing or compression packing, gland packings are rope-like seals used to prevent fluid leakage through the gaps in a pump or valve stuffing box. They have been widely adopted across various industries due to their versatility, cost-effectiveness, and ease of maintenance. However, achieving a reliable, leak-free seal with gland packing requires selecting the right type of packing and following proper installation practices. This article provides an overview of what gland packing is, the common types available, and best practices for gland packing installation to ensure optimal performance and longevity in industrial applications.
What is Gland Packing?
How Gland Packing Works: As the gland follower is tightened, the packing material is compressed. The packing must be soft enough to deform and fill all gaps, yet durable enough to withstand the media pressure and motion (rotational or reciprocating) of the equipment shaft. A correctly installed gland packing will allow a minimal controlled leakage that lubricates and cools the packing, especially in pump applications, to prevent overheatingThis controlled leakage is often visible as a slight drip and is normal for packed pumps (typically a few drops per minute) – it indicates that the packing is properly lubricated and not excessively tight.
Types of Gland Packing
Current gland packings are made from a range of fiber materials and lubricants, each type tailored for specific operating conditions. Common types of gland packing include aramid fiber packings, asbestos packings (now largely replaced by safer substitutes), graphite packings, PTFE packings, graphited PTFE combination packings, carbon fiber packings, and many other specialty materials. Below is an overview of each major type and its characteristics:
Aramid Fiber Gland Packing
Aramid gland packing is braided from aramid fibers (often known as DuPont Kevlar). Aramid fibers are extremely strong and abrasion resistant, making this packing ideal for slurries, water treatment pumps, and other services where abrasive particles or high shaft speeds are present. Aramid packings are often impregnated with PTFE and lubricants to reduce friction. They have a high resilience and maintain volume under compression, which helps avoid frequent gland adjustments. Aramid packings can handle moderate to high pressures and are a popular asbestos replacement due to their strength. Their temperature limit is lower than pure graphite, typically up to about 250–280 °C in steam or water, but they excel in durability. One caution is that the very hardness that gives aramid its wear resistance can also cause shaft sleeve wear if the packing is too tight or not sufficiently lubricated. Aramid fiber packing is often used in pumps handling sand, slurries, or other abrasive media where other soft packings would wear out quickly.
Acrylic PTFE Packing
Acrylic PTFE braided packing is made from high-performance acrylic fibers pre-treated with PTFE (polytetrafluoroethylene) and braided diagonally. During the braiding process, it is further impregnated with a PTFE emulsion, providing excellent sealing, lubrication, and resistance to chemical media. This braided packing is a reliable and cost-effective solution for a wide range of industrial applications, offering durability, chemical resistance, and excellent sealing performance. It wide variety of uses throughout a plant. Used in pumps and valves, it can handle most chemicals except strong acids, strong alkalis, and strong oxidizers. Especially for the condition of middle temperature, high pressure, high speed, and where contamination is not permitted
Ramie Fiber Packing
Ramie fiber packing is also known as “high water-based packing” due to its excellent performance in water-based media. Ramie fiber packing is Clean and non-contaminating, resistant to wear and abrasion. These advantages make it ideal for food and beverage applications and harsh environments like the paper industry. Applications for the Brewing and Beverage Industry: Sealing pumps and valves in beer, wine, and soft drink production. Shipbuilding: Sealing applications in marine equipment. Paper Industry: Resistant to abrasive media like paper pulp in refiners and filters.
PTFE Gland Packing (Teflon Packing)
PTFE gland packing is braided from pure PTFE (polytetrafluoroethylene) fibers, often known by the trade name Teflon. PTFE packings are chemically inert and have superb resistance to almost all corrosive fluids. They are non-reactive across the full pH range of 0-14 and will not contaminate sensitive media. This makes PTFE packings ideal for applications where contamination must be avoided or where aggressive chemicals are present – for example, in chemical processing, food and beverage, pharmaceutical, and pulp & paper industries. PTFE also has a very low coefficient of friction, meaning it produces minimal shaft wear and can tolerate higher shaft speeds in terms of friction (though pure PTFE can deform at high speeds/temperatures). PTFE packings are often either plain braided PTFE (sometimes called “white packing”) or PTFE fibers impregnated with a lubricant to improve pliability and heat dissipation. They are self-lubricating in that PTFE is slick by nature, but adding a bit of inert oil or silicone lubricant can help during break-in. One limitation of PTFE is its temperature range – it can typically be used up to around 260 °C (500 °F). Beyond this, PTFE begins to creep and lose strength (it may carbonize above 500°F). It also has lower mechanical strength compared to fibrous packings like aramid or graphite, so it is best suited to medium and lower pressure service, or where the gland design provides good support. In summary, PTFE braided packing is the go-to choice for corrosion resistance and cleanliness – it will not react with process fluids and does not shed fibers or color, which is why it’s FDA-approved for food-grade applications
Graphited PTFE Gland Packing (PTFE Graphite Packing)
Graphited PTFE packing is a hybrid that combines the chemical inertness of PTFE with the improved heat conductivity and lubricity of graphite. There are a few forms of this type: one common style is yarn made of PTFE fibers that have been impregnated with fine graphite particles (sometimes called PTFE/Graphite packing or GFO packing). Another form is interbraiding PTFE yarns with graphite yarns. The result is a grey colored packing that is softer than pure graphite packing but can handle more heat and pressure than pure PTFE packing. Graphite-filled PTFE packings have very low friction and are often heavily lubricated during manufacture, which makes them easy to break in and very resistant to wear and extrusion. They excel in general-service rotary equipment such as centrifugal pumps, mixers, agitators, and also in valve stems at moderate pressures. This type of packing is especially useful in services where pure PTFE would be too soft or creep (for example, in a pump with a bit of heat or higher pressure), but pure graphite might not be necessary. The graphite inclusion helps dissipate heat and allows the packing to handle a bit higher speeds or pressures than pure PTFE, while the PTFE base ensures excellent chemical resistance. Graphited PTFE packings are commonly used in refining, chemical plants, and industrial applications where a balance of chemical resistance, low friction, and good sealability is needed. They are generally rated for intermediate temperatures (often up to ~280–300 °C, depending on the blend) and medium-high pressures. In low-pressure valves, hydraulic presses, and rotary pumps, graphited PTFE packings provide a long-lasting, non-staining seal with minimal shaft wear.
Carbon Fiber Gland Packing
Carbon fiber gland packing is braided from carbonized synthetic fibers (typically acrylic or PAN fibers that have been carbonized) and often further impregnated with fine graphite and lubricants. This produces a black packing that is strong and thermally conductive, somewhat combining features of graphite and synthetic fiber packings. Carbon fiber packings can handle higher temperatures than pure PTFE (many are rated for services up to 400 °C or even 600 °C for some grades). though in practice they are often used in the mid-temperature range (up to ~280 °C) and in services where a moderate chemical exposure exists. They resist many chemicals (typically pH range ~2-12) and have good sliding characteristics when loaded with graphite. Carbon packings are often used in centrifugal pumps, mixers, and equipment handling hot water, oils, or mild chemicals, where neither extremely high temperature nor highly aggressive chemicals are present. Compared to pure graphite, carbon fiber is less brittle and can be more forgiving on the shaft, though it may not handle as extreme conditions. It is also usually more affordable. Carbon fiber gland packing serves as a good general-purpose high-performance packing: it’s durable, dissipates heat well, and has enough lubricity from the graphite to run fairly cool. It finds application in power plants, refinery equipment, and general industrial pumps. In some products, carbon fiber packings are used with graphite corner reinforcements or combined with PTFE to further tailor their properties. Other Materials: In addition to the above main types, there are many other specialized gland packing materials available. Glass fiber or ceramic fiber packings can be used for very high-temperature static sealing (such as furnace door seals), though they are not common for pump/valve applications. Each packing material has its niche, and manufacturers continue to develop new combinations (like PTFE with Kevlar corners, or Ramie fibers with graphite) to address specific sealing challenges. The key is to match the packing material to the service conditions for optimal performance.
Selecting the Right Gland Packing
Choosing the appropriate gland packing for your equipment is crucial for achieving a reliable seal and a long service life. Here are two primary considerations when selecting a packing:
Match the Packing Material to the Operating Conditions:
Evaluate the medium (fluid) being sealed, the temperature, the pressure, and the shaft speed of your application. Different packings are formulated for different conditions. For example, for high-temperature steam or oil, a graphite or carbon fiber packing would be suitable due to their heat resistance. For corrosive chemicals or food-grade applications, PTFE packing is a top choice because of its broad chemical inertness. If the service involves abrasive slurry or water with sand, an aramid (Kevlar) packing might be preferable due to its abrasion resistance. Also, consider whether the equipment is a pump or a valve: some packings are designed specifically for valves (which may remain static and just need to hold pressure) versus pumps (which have continuous shaft movement). Always consult the technical data or manufacturer’s recommendations for the packing – properties like temperature limit, pressure rating, pH range, and recommended applications will guide you. Using a packing outside of its design envelope can lead to premature failure (for instance, pure PTFE used in a high-speed pump might overheat and extrude, while a hard aramid packing in a soft brass shaft might score the shaft). In summary, identify the demands of your service and pick a packing material known to perform well under those conditions.
Choose the Correct Packing Size:
Gland packings come in various cross-sectional sizes (square or sometimes rectangular cross-sections) to fit different stuffing box dimensions. Selecting the right size is essential – if the packing cross-section is too small, it won’t seal properly (it will be too loose in the stuffing box); if too large, it won’t fit or will be unduly tight. To determine the correct size, you need to know the stuffing box bore diameter (inside diameter of the packing chamber) and the shaft or rod diameter. The packing cross-section is calculated as half of the difference between those diameters. In formula form:
Required Packing Cross-Section=Stuffing Box Bore Diameter−Shaft Diameter/2
For example, if you have a pump with a 50 mm shaft and the stuffing box bore (inside diameter) is 60 mm, then the difference is 10 mm, and half of that is 5 mm – so you would choose a 5 mm square packing for a proper fit. (In imperial units, if you had a 2.125″ bore and a 1.375″ shaft, the difference of 0.750″ divided by 2 gives 0.375″, so a 3/8″ packing is needed. Most packings are sold in standard cross-sections (e.g., 1/8″, 3/16″, 1/4″, 5/16″, 3/8″, 1/2″, etc., or in metric 4 mm, 5 mm, 6 mm, 8 mm, 10 mm, etc.). It’s usually best to round to the nearest standard size available. If the equipment is worn (for instance, an older pump with a worn shaft sleeve or an ovalized stuffing box), you might need to choose a slightly larger size or replace/repair the worn parts, because too much clearance will make sealing difficult. Tip: Always measure your equipment carefully – use calipers to measure shaft diameter and stuffing box bore. It’s good practice to measure the bore at multiple angles in case it’s not perfectly round, and use the largest measurement. If you are ever unsure or between sizes, err on the side of a tad larger pack and gently tap it in, rather than undersizing, which will never seal. Additionally, determine how many rings of packing you need: typically, a stuffing box is filled with several rings (common arrangements are 3 to 7 rings, depending on depth). Ensure you have enough rings to fill the space with a little allowance (often the box is filled to about 0.2–0.25 inches from the top to allow the gland to start compressing). Some guidelines suggest aiming to fill about 80-90% of the depth with packing and then using the gland follower to compress the rest. If unsure, a general formula used is:
Number of Rings=Stuffing Box Depth−Allowance/Cross-Section
Where “Allowance” could be around 1/4″ (6 mm) for small boxes or up to 1″ for large ones, to account for compression space. This will give you a ballpark of how many rings to cut.
By carefully matching both the material and the size of the packing to your application, you set a strong foundation for a successful seal. Using the correct type and size of braided packing will minimize leaks, reduce friction on the shaft, and maximize the lifespan of the packing and the equipment.
Gland Packing Installation Best Practices
Even the best quality packing will perform poorly if it’s not installed correctly. Proper installation is critical to sealing integrity and operational reliability – it ensures leak-free operation, protects your equipment, and prevents excessive wear. Below are the best practices for installing gland packing, from preparation to the final adjustments:
Preparation: Remove Old Packing and Inspect Components
Before installing new packing, always remove all the old packing from the stuffing box. This step is non-negotiable; any remnants of old hardened packing or debris can prevent the new packing from seating properly. Use appropriate tools such as packing hooks or picks to extract every ring of old packing (be careful not to scratch the shaft or the walls of the stuffing box in the process). If the old packing was difficult to remove, it can help to rotate the shaft or stem slightly while pulling out the rings, or use a solvent to loosen any hardened deposits. Once all old material is out, thoroughly clean the stuffing box and shaft. Wipe out any leftover fragments, dirt, or crystallized residue of the fluid. Inspect the metal surfaces: the shaft (or sleeve) and the stuffing box bore should be smooth, with no deep grooves or scoring. If you find significant scratches, pitting, or wear on the shaft or sleeve, consider repairing or replacing those components; deep scores can create leak paths that no amount of new packing can fully seal. Also, check the lantern ring (if present) and other hardware. Replace any worn-out lantern rings, glands, or sleeves as needed. Good installation starts with a clean, smooth sealing environment.
Cutting the Packing Rings
Properly cutting the packing into rings of the correct length is crucial for a tight seal. Never wind a long coil of packing into the stuffing box without cutting it into separate rings – doing so will not distribute pressure evenly and will likely leak. To cut rings that fit well:
Measure and Mark: One reliable method is to wrap the new packing around a mandrel (or the shaft itself, if accessible) that has the same diameter as the shaft. Wrap it one turn and mark the point where the packing overlaps itself by one ring. This length will be the circumference of the shaft and is the length of one ring. Alternatively, use a tailor’s tape or soft measuring tape around the shaft to get the circumference.
Cut at the Proper Angle: For pumps (rotating equipment), a straight cut (90° butt cut) is commonly used for each ring. This means you cut the packing perpendicular to its length, resulting in two flat ends that meet. For valve packing or static applications, a skive cut (45° scarf cut) is often recommended. The angled cut increases the contact area at the joint and helps reduce leakage along the cut by providing a more overlapping joint face. It’s important to use a sharp knife or a specialized packing cutter to get a clean cut without frayed edges. If the packing is a composite (e.g., has wire inside or multiple yarn materials), ensure you cut through all parts cleanly.
Avoid Gaps and Overlaps: Cut each ring carefully to avoid any gap (too short) or overlap (too long) when it’s placed around the shaft. A gap will leak, and an overlap will cause the ring to not sit flat, and could lead to uneven compression. It’s better to err slightly on the side of a very small gap than to have an overlap; a tiny gap can often be closed by compression, whereas an overlap will make the ring too large in diameter. If using the mandrel method, cut one ring at a time and test its fit on the shaft or mandrel – it should just meet end-to-end with minimal gap.
Number of Rings: Prepare the number of rings you calculated earlier. Make sure all rings are the same width and thickness (consistent lengths). It’s a good idea to label or lay them out in order so you can install them without confusion. If you have multiple types of packing (in some cases, people use a different end ring material, or if a lantern ring is used between sets of packings), organize them accordingly.
Tip: Some installers cut rings with a slight bias such that when installed, the ends press tightly. This can be done by cutting the ring a hair long and forcing the ends to butt. But this requires experience to get right. If unsure, cut to exact fit with no overlap. Also, many packings come with a diagonal butt cut jig or have pre-cut rings available from the manufacturer for common sizes, which can simplify installation.
Installing the Packing Rings into the Stuffing Box
With your clean stuffing box and properly cut rings, you can proceed to install the packing:
Insert One Ring at a Time: Install the rings one by one, rather than stacking a bunch and pushing them in together. Take the first packing ring and slide it over the shaft (or stem) into the stuffing box. Use your fingers or a packing insertion tool to press it evenly into the bottom of the box. Ensure it sits squarely and is not twisted. If a lantern ring (a metal or plastic ring with holes that distributes flush water or lubricant) is part of the arrangement, install rings up to the position of the lantern ring, then insert the lantern ring, and then continue with the rest of the packing rings on top of it. The lantern ring must be aligned with the external flush port on the stuffing box if one is used.
Seat Each Ring Firmly: After you put in each ring, you need to compress it before adding the next. You can use the gland follower (the gland piece that compresses the packing) or a temporary wooden dowel, or split tubing as a tamping tool. Slide the gland (without any packing beyond the one ring) and hand-tighten the nuts to push the ring into place, then loosen and remove the gland again to add the next ring. If using a tamper, press down evenly around the circumference of the packing ring to ensure it molds into the space. This step is important to eliminate any voids and to pre-compress each ring slightly.
Stagger the Joints: When installing the subsequent rings, stagger the ring joints by rotating each ring’s cut end at least 90° apart from the previous ring’s cut. In practice, many installers stagger each successive ring by about 120° (if three rings, they’d be 120° apart; if four rings, 90° apart, etc.). The goal is to avoid aligning the cuts, which would create a direct leakage channel through the packing set. By offsetting the cuts, any fluid that migrates through one ring’s joint will be stopped by the solid portion of the ring above or below it.
Continue Until Full: Repeat this process for all rings, installing and seating each one. Make sure the top of the last ring is flush with or slightly above the stuffing box face so that the gland follower will press on it evenly. If the last ring sits too low, you may need an additional ring or a spacer, because the gland might bottom out before compressing the packing fully. If it’s slightly proud, the gland will push it down – that’s okay as long as you can still start the gland nuts.
Initial Compression: Once all rings are in place, install the gland follower (or bonnet for a valve) and tighten the gland nuts finger-tight to start. Then give each nut a partial turn (maybe 1/2 turn) with a wrench in an alternating pattern to apply a uniform load on the packing. At this stage, do not fully tighten the packing – just snug it enough that the packing is compressed in place but not so tight that you have no leakage or the shaft cannot turn. Even compression is key: tighten the nuts alternating left and right, a little at a time, so the gland goes down straight and the pressure on the packing is uniform. A typical recommendation is to compress the packing by about 25-30% of its volume during this initial installation tightening, but without a torque wrench, this is done by feel. In general, do not overtighten at install – it’s better to leave it a bit loose and adjust later than to crush the packing and cause damage or excessive friction.
Post-Installation Adjustments (Pumps vs. Valves)
After the packing is installed and initially tightened, you will need to adjust it under operating conditions to achieve the optimal seal. The procedure differs slightly for pumps and valves:
Pumps: For pump packings, it’s normal and desirable to have a slight leakage during operation. After your initial finger-tight installation, start the pump and let it reach normal operating speed. Observe the packing area: you should see a small amount of liquid leaking or dripping from the stuffing box. This leakage provides lubrication and cooling to the packing. If there is no leakage at all, the packing is likely too tight and could overheat – you should immediately loosen the gland nuts slightly to allow some fluid to escape. If the leakage is excessive (a steady stream), you can gradually tighten the gland nuts in small increments (for example, 1/6th of a turn or one flat of the nut at a time) until the leakage slows to an acceptable drip rate. A common guideline is to allow a few drops per minute of leakage; this keeps the packing cool without wasting too much product. Do not crank down hard all at once – make an adjustment, allow the pump to run for several minutes, then check again. New packing often has a break-in period. As it conforms to the shaft and adjusts to the temperature, the leakage may slow on its own, at which point you might tighten a bit more. Always aim for the minimum controlled leakage that keeps the stuffing box temperature stable (typically, the gland area should be cool enough to touch – below about 60 °C/140 °F. Over-tightening a pump’s packing can not only burn the packing but can also score the shaft and significantly increase the motor load due to friction.
Valves: For valve stem packings, the goal is zero leakage when the valve is closed, but you also want to avoid making the valve too difficult to operate. After installing the packing in a valve, tighten the gland nuts to the manufacturer’s specified torque if available. In the absence of a specified torque, tighten just enough to stop leakage at the maximum operating pressure. You can test the valve by operating it (opening and closing fully a few times). Expect a slight settling – the packing may loosen slightly after cycling the valve because it adjusts to the stem movement. After a few cycles, re-tighten the gland nuts a little to maintain a good seal. In some industries (like steam valves), standard practice is to tighten the packing, pressurize the system, check for leaks, and if a slight leak is observed around the stem, tighten a quarter turn more until it stops. Be cautious not to overtighten a valve packing all at once; doing so can cause high friction that makes the valve hard to turn and can even damage the stem. It’s better to tighten incrementally. Once the valve is holding pressure with no visible leakage, cycle it again and re-check. It’s not unusual to have to adjust the new packing after the first few operations. After that, the packing should hold and only need periodic checks. In critical valves, using a torque wrench and following a torque-turn specification is ideal to ensure even stress on the packing set, but for most general industrial valves, a careful manual tightening procedure works fine. Whether pumps or valves, remember that gland packing is intended to be adjustable. It’s one of the advantages of compression packings that you can tighten the gland over time to compensate for wear. That leads to the next topic: maintenance.
Maintenance and Replacement of Gland Packing
One of the benefits of using gland packings is that they allow for easy in-service adjustment and maintenance. To get the best life out of a packing installation, regular monitoring is important. Make it part of a routine inspection to observe the packing glands on your pumps and valves:
Leakage and Tightening: Keep an eye on the leakage rate. A slight weep or drip is normal (particularly for pump shafts), but if you notice the leakage increasing over time, it’s a sign the packing is wearing. When leakage becomes too high for acceptable operation, use a wrench to tighten the gland nuts gradually until the leakage is back to a manageable level. Always tighten in small increments and evenly on both sides to avoid cocking the gland. For pump packings, do this adjustment while the pump is running if possible (and safe) so you can immediately see the effect on leakage and feel for any heating. For valves, you can tighten when the valve is in the closed position and pressurized, to judge when the leak stops. Regular small adjustments can significantly extend the packing life by compensating for wear
Avoid Overcompression: If you find that you have tightened the gland fully (the nuts can’t go down further or the packing is fully crushed) and it’s still leaking more than tolerable, do not continue to force it. This means the packing has lost its elasticity or has worn away and can no longer seal effectively. At this point, further tightening will not help and could damage the equipment. It’s time to replace the packing with a new set of rings.
Planned Replacement: Even without excessive leakage, it’s good practice to replace gland packings periodically as part of maintenance, especially in critical equipment. Over time, packings can harden, glaze, or become chemically attacked such that their sealing performance degrades. If you have an opportunity to repack (for instance, during a pump overhaul or valve refurbishment), take it. Fresh packing will ensure continued, reliable sealing. Packings are relatively inexpensive components, especially compared to the potential cost of leakage or downtime.
Signs of Failure: Recognize signs that indicate the packing needs replacing: if the packing gland is hot to the touch (indicating it’s running dry or too tight), if you see smoke or burnt odor (in pump packing, this means overheating), or if adjusting no longer reduces leakage, you have likely reached the end of that packing’s life. Additionally, if the fluid being sealed starts to solidify or crystallize in the packing (as can happen with some fluids upon exposure to air or cooling), the packing can lose flexibility. In such cases, remove and replace it, and also consider flushing systems to keep the packings clean during operation.
When replacing, always replace the entire set of packing rings at once with new material. Do not just add a ring or two to old rings or mix old and new, as this can create uneven pressures, and the old packing could rapidly compromise the new. Starting fresh ensures a uniformly dense packing set that will function as designed. By following these installation, adjustment, and maintenance guidelines, you can ensure your gland packing seals are installed correctly and operating at peak efficiency, providing effective, long-lasting leakage control. Gland packings, when properly selected and cared for, offer a dependable sealing solution in a wide variety of industrial applications, keeping pumps and valves running smoothly while minimizing downtime and maintenance costs. With careful attention to detail and regular upkeep, your braided gland packings will continue to perform and protect your equipment, proving why this traditional sealing method remains relevant and reliable in the industrial world.